I am learning Pulumi and I'll be sharing my journey along the way here in the form of blog posts and code samples on my GitHub. Join me on this journey if this topic interests you.
Disclaimer: I have hands-on experience working with Microsoft Azure Cloud platform not so much with others. So in here, I'll be looking at Pulumi from Azure's lens and most of my references and examples will be with Azure.
If you haven't read my previous blog posts around this topic, you can check them out here:
In this blog post, I'm going to explore and understand how configuration management works in Pulumi.
Understanding the Basics
In Pulumi each stack can be configured separately. By default, when using pulumi new a stack is created at that time and the file is named as Pulumi.[stack name].yaml. However, you can create new stacks with pulumi stack init command at any time. It's important to notice that with pulumi stack init no new file is created, this is something we need to create manually.
Stack configuration files are used to store stack variables and secrets (more on this in another blog post). We can interact with configuration management either via CLI or programmatically. Let's check them out.
Working with Configuration via CLI
Pulumi CLI provides pulumi config to work with the configuration systems.
pulumi config set <key> [value]: sets a configuration entry <key> to [value]
pulumi config get <key>: gets an existing configuration value with the key <key>
pulumi config: gets all configurations for the current stack. you can specify -s <stack name> flag to retrieve configurations for a particular stack.
Pulumi uses the project name as the default namespace and appends it as a prefix for key names. So pulumi config set location australiasoutheast will end up adding an entry (key/value) to Pulumi.dev.yaml file like this (where hello-pulumi is the project name):
config:
  azure:location: australiaeast
  hello-pulumi:location: australiasoutheast
This (namespace) makes it easier to segregate the configurations for different providers or components.
So if we have to retrieve the key from the specific namespace, we can specify the full name by adding prefix while fetching e.g., pulumi config get 'azure:location' or pulumi config get 'hello-pulumi:location'
Working with Configuration via Code
Working with configuration via code is also very straightforward. For C#, Pulumi exposes Pulumi.Config type.
var config = new Pulumi.Config();
var resourcesName = config.Get("resourcesName");
var location = config.Require("location");
Pulumi.Config() takes the namespace name as an optional parameter. If you don't pass it uses the project name
Using Config.Get will return null if the configuration value was is provided whereas Config.Require raises an exception with a helpful error message to prevent the deployment from continuing until the variable has been set.
Pulumi also exposes Pulumi.Deployment.Instance that allows us to retrieve the project name and stack name etc. at runtime Pulumi.Deployment.Instance.StackName and Pulumi.Deployment.Instance.ProjectName
Structured Configuration
Often we have structured configuration such as a JSON or YAML that we need to deal with in our applications. Pulumi works wonderfully well with that type of configuration as well.
We use the same pulumi config command to interact with the configuration system. The only difference with structured configuration is we need to pass --path switch such as
pulumi config set --path 'data.active' true
So let's set some configuration using the CLI.
pulumi config set --path 'data.active' true
pulumi config set --path 'data.nums[0]' 1
pulumi config set --path 'data.nums[1]' 2
pulumi config set --path 'data.nums[2]' 3
This results in following configuration.
config:
  azure:location: australiaeast
  hello-pulumi:location: australiasoutheast
  hello-pulumi:data:
    active: true
    nums:
    - 1
    - 2
    - 3
To retrieve the setting via the CLI, we use pulumi config get --path 'data.nums[2] and it returns 3
For programmatic approach, Pulumi exposes Config.GetObject and Config.RequireObject for such functionality
var config = new Pulumi.Config();
var data = config.RequireObject<JsonElement>("data");
Pulumi.Log.Info($"Active: {data.GetProperty("active")}");
Pulumi.Log.Info($"Nums[2] number?: {data.GetProperty("nums")[2]}");
Get vs Require works in a similar fashion we discussed previously.
Making changes to our program
In the previous blog post, we created a hello world pulumi program that created a resource group and a storage account for us (check out the source here). That time the resources were assigned unique names by Pulumi (this is the default behavior if we don't specify Name property of any resource). Let's change that and assign names explicitly to the resource group and storage account.
The naming convention I want to use is:
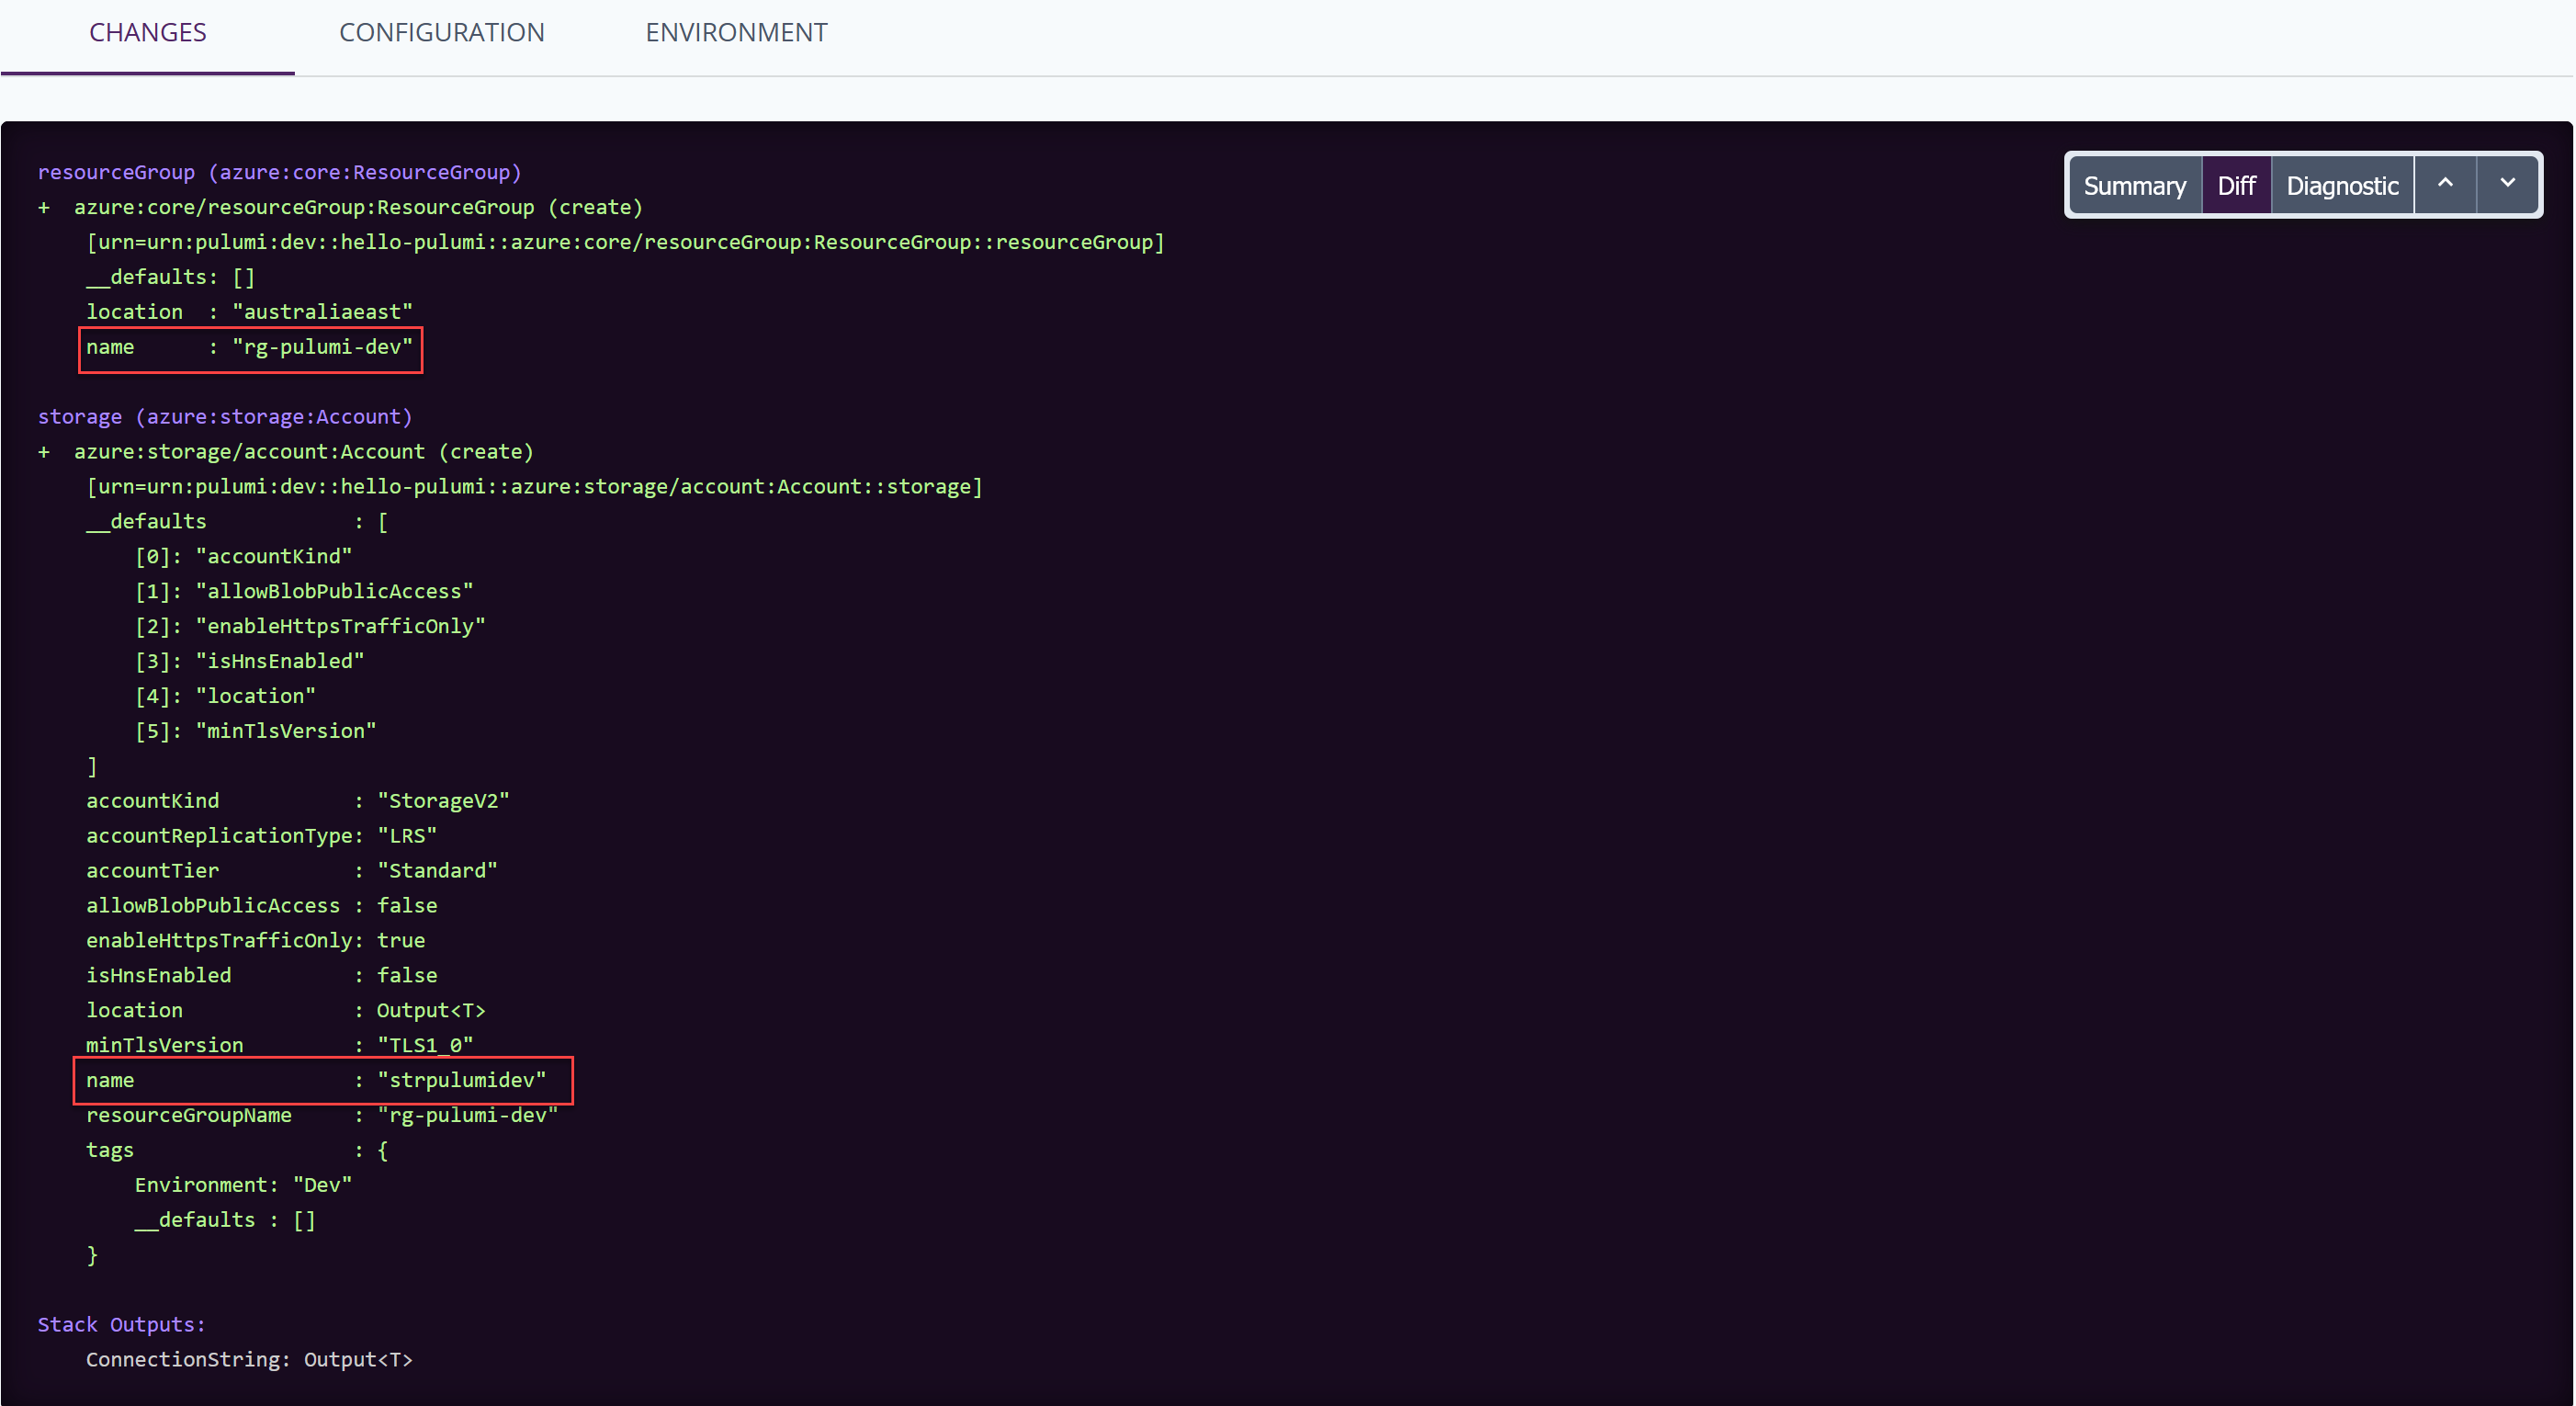
Resource Group: 'rg-pulumi-dev' (where 'dev' is the environment that we pick from the stack name).
Storage Account: 'strpulumidev'
In order to pick up the stack name at runtime, we can use Deployment.Instance
var stack = Deployment.Instance.StackName;
Now, let's define a new property called resourcesName by using the following command in our terminal:
pulumi config set resourcesName pulumi
This adds a new key/value pair in our dev stack. Once we have it, let's read that in our code.
var resourcesName = config.Require("resourcesName");
Lets use this information to construct the resource name at runtime
var resourceGroupName = $"rg-{resourcesName}-{stack}";
Now, we expand our resource group resource declaration to this:
var resourceGroup = new ResourceGroup("resourceGroup", new ResourceGroupArgs()
        {
            Name = resourceGroupName, //If we don't set this, Pulumi generates a random unique Id by itself
            Location = location
        });
Repeat it for storage account.
// Construct storage account name
var storageAccountName = $"str{resourcesName}{stack}";
var storageAccount = new Account("storage", new AccountArgs
{
    ResourceGroupName = resourceGroup.Name,
    Name = storageAccountName,  //If we don't set this, Pulumi generates a random unique Id by itself
    AccountReplicationType = "LRS",
    AccountTier = "Standard",
    Tags =  {
        { "Environment", "Dev" }
    }
});
Now when we do pulumi preview we can see what Pulumi is going to create for us by checking state over at pulumi.com
Summary
Pulumi provides a robust mechanism for configuration management of your infrastructure. You can interact with configs via the CLI and programming model with the same ease. There are a number of built-in utility functions within the SDK to make it easier to work with configurations. You can use the power of programming language to work with the configurations like you normally would in your application.
You can check out the entire source code along with configuration file here for reference.
Cheers
comments powered by Disqus